In earlier versions of Windows 10, if you some how deleted the built in Microsoft Print to PDF virtual driver, getting it back required a quick trip to your printer settings. In more recent versions of Windows 10, those steps are no longer applicable, instead, you can use the advanced DISM commands to restore your Microsoft Print to PDF driver. Here is how you can do it.
If you are running an earlier version of Windows 10 that supports the older method, check out the following article:
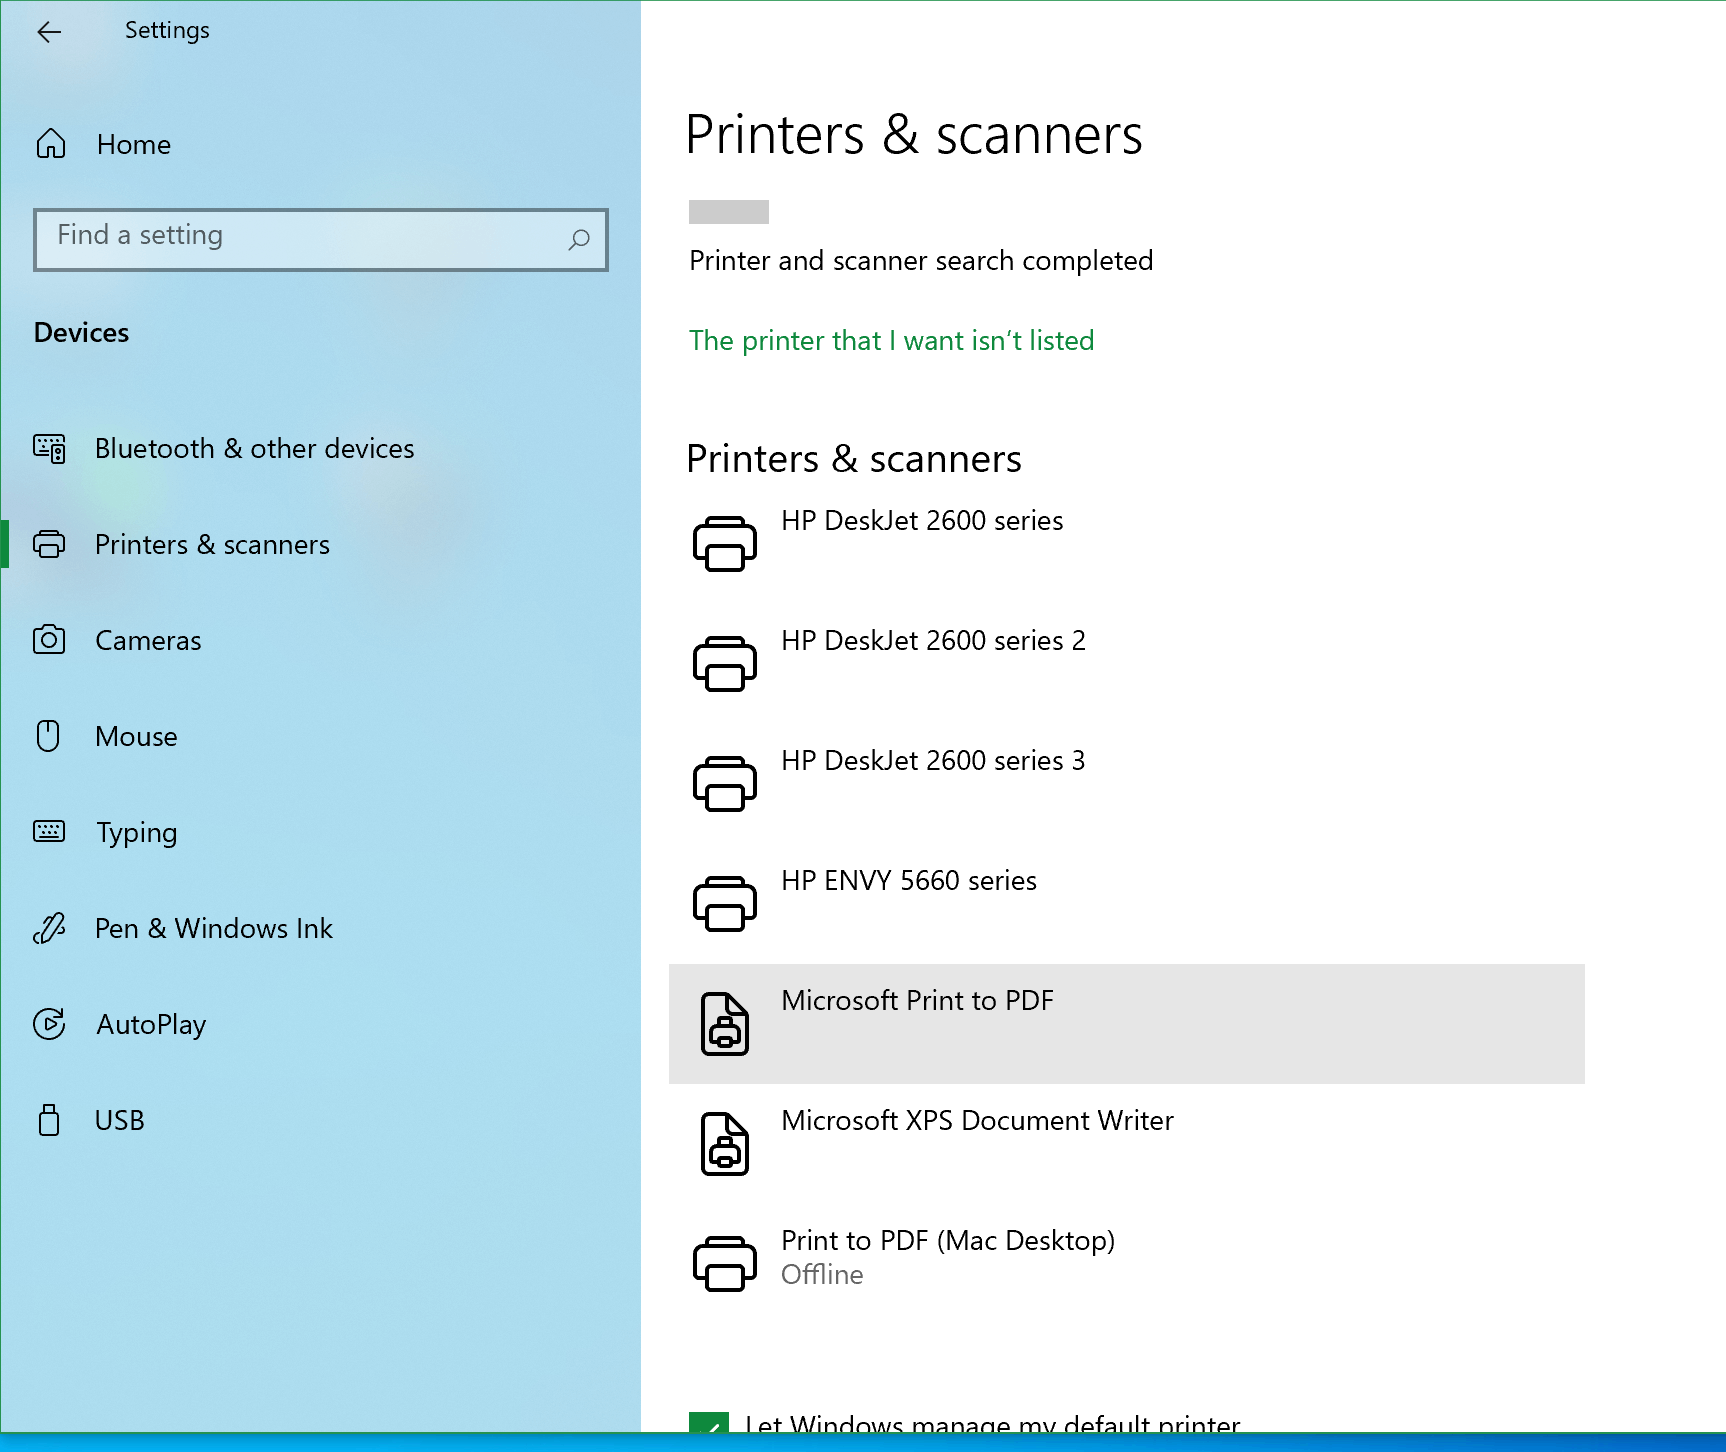
If you are no longer seeing the Microsoft Print to PDF icon, its still installed on your system.

To reinstall it, we will use the Command Prompt and the following DISM commands:
Click Start, type CMD, then click Run as administrator

At the command prompt, type or copy then paste the following command, then hit Enter:
dism /Online /Disable-Feature /FeatureName:"Printing-PrintToPDFServices-Features" /NoRestart

Wait while the command executes successfully:

At the command prompt, type or copy then paste the second command, then hit Enter:
dism /Online /Enable-Feature /FeatureName:"Printing-PrintToPDFServices-Features" /NoRestart

Wait while the command executes successfully:

Click Start > Settings > Devices > Printers
You should now see the Microsoft Print to PDF restored:
How to Add or Reinstall the Microsoft PDF Printer
Details
Click Start then type: devices and printers
Hit Enter
Click Add Printer on the command bar

Click The printer that I want isn't listed
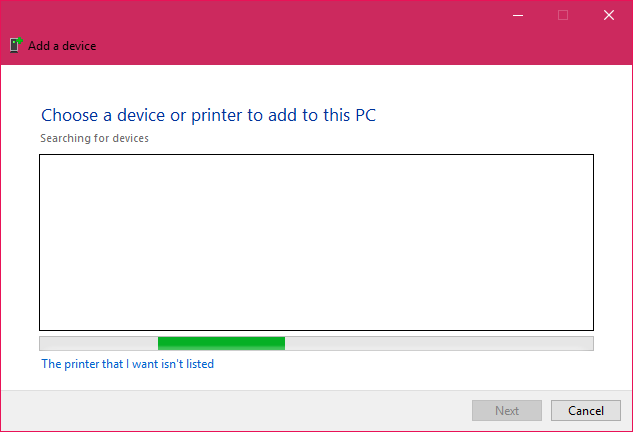
Click Add a local printer or network printer with manual settings then click Next

Select Use an existing port then click in the list box then select PDF (Local Port)

Scroll down and select Microsoft under Manufacturer then scroll down and select Microsoft Print to PDF under Printers then click Next
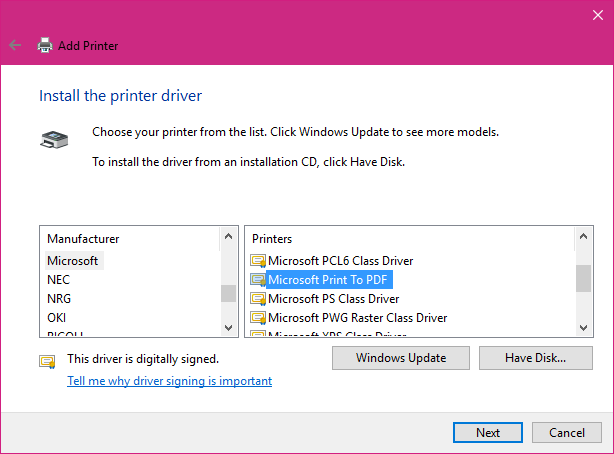
Give the printer a name or leave the default, click Next

Click Finish


Comments
Post a Comment